From inside (document excerpt):
RX-8_8V89-EA-06F_Edition1 Page1 Friday, May 19 2006 9:49 AM Black plate (1,1) Form No.8V89-EA-06F RX-8_8V89-EA-06F_Edition1 Page2 Friday, May 19 2006 9:49 AM Black plate (2,1) Form No.8V89-EA-06F RX-8_8V89-EA-06F_Edition1 Page3 Friday, May 19 2006 9:49 AM Black plate (3,1) A Word to Mazda Owners Thank you for choosing a Mazda. We at Mazda design and build vehicles with complete customer satisfaction in mind. To help ensure enjoyable and trouble-free operation of your Mazda, read this manual carefully and follow its recommendations.
User and Operator’s Vehicle Manual Guide. Free Auto PDF Manual Download. Years covered by this manual: 2007.
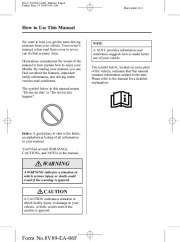
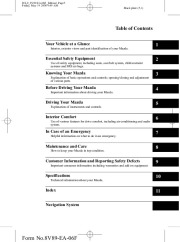
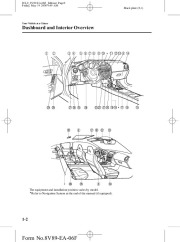
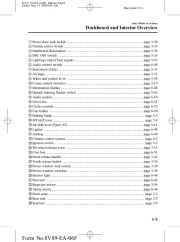
An Authorized Mazda Dealer knows your vehicle best. So when maintenance or service is necessary, that’s the place to go. Our nationwide network of Mazda professionals is dedicated to providing you with the best possible service. We assure you that all of us at Mazda have an ongoing interest in your motoring pleasure and in your full satisfaction with your Mazda product. Mazda Motor Corporation HIROSHIMA, JAPAN Important Notes About This Manual Keep this manual in the glove box as a handy reference for the safe and enjoyable use of your Mazda. Should you resell the vehicle, leave this manual with it for the next owner. All specifications and descriptions are accurate at the time of printing. Because improvement is a constant goal at Mazda, we reserve the right to make changes in specifications at any time without notice and without obligation. Event Data Recorder This vehicle is equipped with an event data recorder. In the event of a crash, this device records data related to vehicle dynamics and safety systems for a short period of time. These data can help provide a better understanding of the circumstances in which crashes and injuries occur and lead to the designing of safer vehicles. Air Conditioning and the Environment Your Mazda’s genuine air conditioner is filled with HFC134a (R134a), a refrigerant that has been found not to damage the earth’s ozone layer. If the air conditioner does not operate properly, consult an Authorized Mazda Dealer. Please be aware that this manual applies to all models, equipment and options. As a result, you may find some explanations for equipment not installed on your vehicle. 2006 Mazda Motor Corporation Printed in Japan June 2006(Print1) Form No.8V89-EA-06F RX-8_8V89-EA-06F_Edition1 Page4 Friday, May 19 2006 9:49 AM Black plate (4,1) How to Use This Manual We want to help you get the most driving pleasure from your vehicle. Your owner’s manual, when read from cover to cover, can do that in many ways. Illustrations complement the words of the manual to best explain how to enjoy your Mazda. By reading your manual, you can find out about the features, important safety information, and driving under various road conditions. The symbol below in this manual means “Do not do this ” or “Do not let this happen “. NOTE A NOTE provides information and sometimes suggests how to make better use of your vehicle. The symbol below, located on some parts of the vehicle, indicates that this manual contains information related to the part. Please refer to the manual for a detailed explanation. Index: A good place to start is the Index, an alphabetical listing of all information in your manual. You’ll find several WARNINGs, CAUTIONs, and NOTEs in the manual. WARNING A WARNING indicates a situation in which serious injury or death could result if the warning is ignored. CAUTION A CAUTION indicates a situation in which bodily injury or damage to your vehicle, or both, could result if the caution is ignored. Form No.8V89-EA-06F RX-8_8V89-EA-06F_Edition1 Page5 Friday, May 19 2006 9:49 AM Black plate (5,1) Table of Contents Your Vehicle at a Glance Interior, exterior views and part identification of your Mazda. 11 Essential Safety Equipment Use of safety equipment, including seats, seat belt system, child-restraint systems and SRS air bags. Knowing Your Mazda Explanation of basic operations and controls; opening/closing and adjustment of various parts. Before Driving Your Mazda Important information about driving your Mazda. Driving Your Mazda Explanation of instruments and controls. Interior Comfort Use of various features for drive comfort, including air-conditioning and audio system. In Case of an Emergency Helpful information on what to do in an emergency. Maintenance and Care How to keep your Mazda in top condition. Customer Information and Reporting Safety Defects Important consumer information including warranties and add-on equipment. Specifications Technical information about your Mazda. Index Navigation System Form No.8V89-EA-06F RX-8_8V89-EA-06F_Edition1 Page6 Friday, May 19 2006 9:49 AM Black plate (6,1) Form No.8V89-EA-06F RX-8_8V89-EA-06F_Edition1 Page7 Friday, May 19 2006 9:49 AM Black plate (7,1) 1 Your Vehicle at a Glance Interior, exterior views and part identification of your Mazda. Dashboard and Interior Overview 1-2 Exterior Overview . 1-4 1-1 Form No.8V89-EA-06F RX-8_8V89-EA-06F_Edition1 Page8 Friday, May 19 2006 9:49 AM Black plate (8,1) Your Vehicle at a Glance Dashboard and Interior Overview The equipment and installation position varies by model. Refer to Navigation System at the end of the manual (if equipped). 1-2 Form No.8V89-EA-06F RX-8_8V89-EA-06F_Edition1 Page9 Friday, May 19 2006 9:49 AM Black plate (9,1) Your Vehicle at a Glance Dashboard and Interior Overview Power door lock switch . page 3-30 Outside mirror switch page 3-53 Dashboard illumination . page 5-38 DSC OFF switch . page 5-24 Lighting control/Turn signals page 5-55 Audio control switch . page 6-40 Instrument cluster page 5-33 Air bags . page 2-32 Wiper and washer lever . page 5-58 Cruise control switches page 5-19 Information display page 6-46 Hazard warning flasher switch page 5-62 Audio system . page 6-10 Glove box page 6-51 Center console . page 6-52 Cup holder . page 6-50 Parking brake . page 5-5 MT shift lever page 5-9 AT shift lever (Sport AT) . page 5-11 Lighter . page 6-48 Ashtray . page 6-49 Climate control system page 6-2 Ignition switch . page 5-2 Tilt wheel release lever page 3-53 Coin box page 6-51 Hood release handle page 3-42 Trunk release button page 3-34 Power window lock switch page 3-39 Power window switches page 3-38 Interior light . page 6-44 Sunvisor . page 6-44 Rearview mirror . page 3-54 Vanity mirror page 6-44 Front seats page 2-2 Rear seat page 2-8 Seat belt . page 2-9 1-3 Form No.8V89-EA-06F RX-8_8V89-EA-06F_Edition1 Page10 Friday, May 19 2006 9:49 AM Black plate (10,1) Your Vehicle at a Glance Exterior Overview The equipment and installation position varies by model. 1-4 Form No.8V89-EA-06F RX-8_8V89-EA-06F_Edition1 Page11 Friday, May 19 2006 9:50 AM Black plate (11,1) Your Vehicle at a Glance Exterior Overview Trunk lid page 3-33 Rear window defroster . page 5-60 Antenna . page 6-10 Power windows . page 3-37 Outside mirror page 3-53 Tires . page 8-24 Light bulbs . page 8-29 Hood page 3-42 Windshield wiper blades page 8-19 Moonroof . page 3-43 Fuel-filler lid page 3-40 Doors and keys page 3-29 1-5 Form No.8V89-EA-06F RX-8_8V89-EA-06F_Edition1 Page12 Friday, May 19 2006 9:50 AM Black plate (12,1) 1-6 Form No.8V89-EA-06F RX-8_8V89-EA-06F_Edition1 Page13 Friday, May 19 2006 9:50 AM Black plate (13,1) 2 Essential Safety Equipment Use of safety equipment, including seats, seat belt system, child-restraint systems and SRS air bags. Seats . Front Seats (Manually Operated Seats) . Front Seats (Electrically Operated Seats) Rear Seat . 2-2 2-2 2-5 2-8 Seat Belt Systems 2-9 Seat Belt Precautions 2-9 Location of Seat Belt . 2-12 Seat Belt 2-13 Front Seat Belt Pretensioner and Load Limiting Systems . 2-14 Seat Belt Extender . 2-17 Seat Belt Warning Light/Beep 2-18 Child Restraint Child Restraint Precautions . Installing Child-Restraint Systems LATCH Child-Restraint Systems SRS Air Bags . Supplemental Restraint Systems (SRS) Precautions . Supplemental Restraint System Components . How the Air Bags Work 2-19 2-19 2-23 2-29 2-32 2-32 2-37 2-40 2-1 Form No.8V89-EA-06F RX-8_8V89-EA-06F_Edition1 Page14 Friday, May 19 2006 9:50 AM Black plate (14,1) Essential Safety Equipment Seats Front Seats (Manually Operated Seats) WARNING Make sure the adjustable components of a seat are locked in place: Adjustable seats and seatbacks that are not securely locked are dangerous. In a sudden stop or collision, the seat or seatback could move, causing injury. Make sure the adjustable components of the seat are locked in place by attempting to slide the seat forward and backward and rocking the seatback. WARNING Do not modify or replace the front seats: Modifying or replacing the front seats such as replacing the upholstery or loosening any bolts is dangerous. The front seats contain air bag components essential to the supplemental restraint system. Such modifications could damage the supplemental restraint system and result in serious injury. Consult an Authorized Mazda Dealer if there is any need to remove or reinstall the front seats. Do not drive with damaged front seats: Driving with damaged front seats is dangerous. A collision, even one not strong enough to inflate the air bags, could damage the front seats which contain essential air bag components. If there was a subsequent collision, an air bag may not deploy which could lead to injuries. Always have an Authorized Mazda Dealer inspect the front seats, front seat belt pretensioners and air bags after a collision. qSeat Slide WARNING Adjust the driver seat only when the vehicle is stopped: Adjusting the driver’s seat while the vehicle is moving is dangerous. The driver could lose control of the vehicle and have an accident. To move a seat forward or backward, raise the lever and slide the seat to the desired position and release the lever. 2-2 Form No.8V89-EA-06F RX-8_8V89-EA-06F_Edition1 Page15 Friday, May 19 2006 9:50 AM Black plate (15,1) Essential Safety Equipment Seats Make sure the lever returns to its original position and the seat is locked in place by attempting to push it forward and backward. WARNING Do not drive with the seatback unlocked: The seatback plays an important role in your protection in a vehicle. Leaving the seatback unlocked is dangerous as it can allow passengers to be ejected or thrown around and baggage to strike occupants in a sudden stop or collision, resulting in severe injury. After adjusting the seatback at any time, even when there are no other passengers, rock the seatback to make sure it is locked in place. To change the seatback angle, lean forward slightly while raising the lever. Then lean back to the desired position and release the lever. qSeat Recline WARNING Do not drive with the seats reclined: Sitting in a reclined position while the vehicle is moving is dangerous because you don’t get the full protection from seat belts. During sudden braking or a collision, you can slide under the lap belt and suffer serious internal injuries. For maximum protection, sit well back and upright. Always sit in a passenger seat properly with the seatback upright and feet on the floor: If your vehicle is equipped with front passenger seat weight sensors, sitting in the front passenger seat improperly out of position or with the seatback reclined too far while the vehicle is moving is dangerous as it can take off weight from the seat bottom and affect the weight determination of the front passenger sensing system. As a result the front passenger will not have the supplementary protection of the air bag and seat belt pretensioner, which could cause result in serious injury. Always sit upright against your seatback, with your feet on the floor. Make sure the lever returns to its original position and the seatback is locked in place by attempting to push it forward and backward. 2-3 Form No.8V89-EA-06F RX-8_8V89-EA-06F_Edition1 Page16 Friday, May 19 2006 9:50 AM Black plate (16,1) Essential Safety Equipment Seats qFolding the Passenger’s Seat CAUTION When returning a rear-reclined seatback to its upright position, make sure you hold onto the seatback with your other hand while operating the lever. If the seatback is not supported, it will flip forward suddenly and could cause injury. WARNING Do not drive with the seatback unlocked: The seatback plays an important role in your protection in a vehicle. Leaving the seatback unlocked is dangerous as it can allow passengers to be ejected or thrown around and baggage to strike occupants in a sudden stop or collision, resulting in severe injury. After adjusting the seatback at any time, even when there are no other passengers, rock the seatback to make sure it is locked in place. To fold the seatback, pull the lever and lower the seatback forward. qHeight Adjustment (Driver’s Seat) By moving the seat lever up or down, the seat bottom height can be adjusted. Up Down To return it to the upright position, lift the seatback and push it into place. Rock the seatback to make sure it is locked. 2-4 Form No.8V89-EA-06F RX-8_8V89-EA-06F_Edition1 Page17 Friday, May 19 2006 9:50 AM Black plate (17,1) Essential …..
current vehicle position screen. Navigation Set Up Routing MEMO 39 Before Use Getting started Address Book Navigation Set Up Navigation Set Up lYou can alter the map display conditions, the route guidance conditions and show the system information. n Stop your vehicle before the following operations. Do not change the settings and destination locations while driving. Minimize the time spent viewing the monitor screen and listening to the voice guidance while driving. Operating the system will distract the driver from looking ahead of the vehicle and may cause an accident. Always stop the vehicle in a safe location and put the parking brake on before operating the system. Before Use Getting started Warning 40 Routing Address Book Before Steps MENU ENTER select ( ( ( ( ( ( page 41) page 43) page 47) page 48) page 44) page 46) ENTER Open [NAVIGATION SETUP] Navigation Set Up Navigation Set Up MENU ENTER User Setting ENTER ENTER Before Use select Before Steps ENTER select Getting started Routing Open the [USER SETTINGS] screen n Map Color Select a screen color from to options. Address Book n Map Mode l Auto : The display will automatically switch between Day and Night illumination mode when the headlights are turned off and on respectively. l Day : The display will be presented in Day illumination mode regardless of whether the headlights are on or off. l Night : The display will be presented in Night illumination mode regardless of whether the headlights are on or off. Navigation Set Up n Distance Select the distance unit from or. n Average Speed Set the average speed for each road to be driven. (This function sets the standard speed (average vehicle speed for each route) used for calculating the estimated arrival time when calculating the route time.) : Average speed setting :Changes back to default n Road Restriction Warnings The display of warnings during route guidance when passing through areas with traffic restrictions can be turned on or off. 41 Navigation Set Up MENU ENTER User Setting ENTER ENTER select Before Use Getting started Before Steps ENTER select 42 Routing Address Book Open the [USER SETTINGS] screen n Arrival Time The time which is displayed until reaching the destination or a way point can be set as an estimated arrival time or the remaining time. Select to display the estimated arrival time, or display the remaining time. to n Keyboard Layout Navigation Set Up The layout of input keys can be selected as or. n Clock Allows selection of whether clock is to be displayed. n Beep Allows selection of whether beep will sound. Navigation Set Up Quick POI Selection Before Use This function allows you set the categories on the area displayed when the (Point of Interest) menu is selected on the map. Quick POI enables you store up to six different kinds of categories which you use most regularly. 1 2 MENU ENTER ENTER select ENTER ENTER Getting started select Routing Open the [QUICK POI SELECTION] screen Select the button for Quick POI storage. Address Book Note lSelect the category to be changed : This button allows you to restore the factory settings. Navigation Set Up Select a category. Once selected, subcategories will be displayed. : Subcategories from all of the individual categories will be displayed together. Select the subcategories to be displayed on the map. Repeat the above steps to add further POI markers displayed on the menu. 43 Navigation Set Up Before Use Getting started Calibration This function allows you to correct any error in the position or direction of your vehicle display. Before Steps MENU ENTER select Set Cloc Adjusting Current Position and Direction ENTER select Move ENTER The current a GPS sate ENTER 44 Routing Address Book Open the [Calibrate Position] screen to the correct position and select ENTER. se Open the Use select or to adjust the direction in which you are heading, and. Navigation Set Up Note Minutes are under the fo lDriving acr lDaylight sa Distance This function automatically corrects any error in the display of the current position that might occur after tire replacement. ENTER Map Vers ENTER The map an se select ENTER Map and so You will have to drive about 6 miles (10 km) before distance correction is complete. Before Use ENTER ENTER select ENTER Getting started Set Clock The current time is set using this function. Since time notification is provided by a GPS satellite. ENTER Routing select ENTER Address Book NTER. Open the [SET CLOCK] screen Select if you prefer 24-hour display; for 12-hour display. Select to move the setting ahead by one hour, and similarly, select to move it back by one hour. How to exit. u are heading, and Navigation Set Up Note Minutes are adjusted by the GPS, however, it is necessary to adjust hours under the following conditions: lDriving across different time zones lDaylight saving time start and end Map Version The map and software version numbers can be confirmed using this function. ENTER rent position that select ENTER Map and software versions are now displayed. on is complete. 45 Navigation Set Up Before Use Getting started Restore System Defaults This function replaces all the settings in the mobile navigation system with the initial default settings. MENU ENTER select ENTER ENTER Before Steps ENTER select 46 Routing Address Book Open the [SYSTEM DEFAULTS] screen Select. If you execute Restore System Defaults, all of your stored setting data will be deleted. Navigation Set Up [Default List] Item Menu names Map Orientation Map display mode Map Display scale/Map scale for Dual-screen is not object of backup. Display guidance language Quick-POI map display Quick-POI Selection Initial condition North up Single-screen display Single-screen: 10,000 map (1/16 mi) English All Off A : Gas station B : ATM C : Police Station D : Grocery store E : All Restaurant F : Hotel US9 (including Washington DC) 1 Auto Miles 4 24h ABC Time Off On Off ON Single Turn List Search Area Map Color Day/Night/Auto Setting Distance Units (Miles/KM) (Global setting) Volume Presets Time display change (12h/24h) Keyboard layout Arrival Time Navigation Setup (Clock) Navigation Setup (Beep) Map Configuration Freeway Information Guidance Screen Map screen Turn Guidance Screen Navigation Set Up You can change the language of the menu and the voice guidance. Language Before Use MENU ENTER select ENTER ENTER Before Steps ENTER select Getting started Routing Open the [LANGUAGE] screen Select your preferred language from the list. 47 Address Book Navigation Set Up Navigation Set Up MENU ENTER Map Configuration ENTER ENTER select Before Use Getting started Before Steps ENTER select n Map Screen Select single or dual map display. Open the [MAP CONFIGURATION] screen 48 Routing Address Book Single map Dual map n Turn Guidance Navigation Set Up Enlarged Junction Diagram Before a fork in the road, an enlarged diagram of the junction automatically appears in a second screen.This is to make route guidance even clearer. During route guidance, an enlarged diagram of an approaching fork or junction appears. When you drive past the junction, the enlarged diagram disappears. During route guidance, an enlarged diagram of the freeway automatically appears in a second screen as you approach a fork on the freeway. This is to make route guidance even clearer. Turn List While using route guidance, the directions for the next junction where you have to turn are shown as Turn List. Turn Arrow While using route guidance, the directions for the next junction where you have to turn are shown as Turn Arrow. n Junction Detail Select whether the Enlarged Junction diagram screen is displayed automatically. n Freeway Information Allows selection of whether the guidance screen is to be displayed while driving on a freeway. Precautions/System Performance Voice Guidance Before Use Warnings l The navigation system is just a support system for the driver. The driver should always pay attention to the traffic situation to safely make decisions. You may be unable at times to arrive at your destination due to out-of-date information on a map disc. You should be especially careful when selecting an urgent destination such as a hospital or a police station. l Your route may sometimes include roads that are not open to vehicles or are closed due to traffic regulations. Please comply with the local traffic regulations. l Do not change the settings and destination locations while driving. Minimize the time spent viewing the monitor screen and listening to the voice guidance while driving. Operating the system will distract the driver from looking ahead of the vehicle and may cause an accident. Always stop the vehicle in a safe location and use the parking brake before operating the system. Getting started Routing Address Book Voice Recognition Voice guidance has the following functions: n Intersection guidance lThe system voice announces the distance to an upcoming turn and the turning direction. This guidance function is automatic. Therefore, you do not have to set it, and it cannot be disabled. lThe system vocally announces the distance to an upcoming highway branching point or junction. Route Second branching point 150m If necessary First branching point Roundabout. Take the second exit. Left turn ahead, then right turn. 100m In 700m left turn. When two intersections are close together, the voice guidance may be late. When two roundabouts are close together, the voice guidance for the second may be late. 49 GPS Before Use Getting started GPS is a position detecting system utilizing the signals from GPS satellites deployed by the U.S. Department of Defense. The Mobile Navigation System uses input from three or more satellites and calculates the vehicle position based on the principle of triangulation. The positioning accuracy of the system corresponds to the error display of the GPS which is from about 30 to 200 meters. lIf you are using the system for the first time, or if you have not used it for some time, it takes about 5 minutes (or about 2 minutes in open areas) to calculate your vehicle’s position. n GPS 50 Routing Address Book Voice Recognition signal reception is poor in the following places If necessary In tunnels Among high-rise buildings Under elevated roads In wooded areas lThe GPS satellites are controlled by the U.S. Defense Department, which may intentionally lower positioning accuracy. In such cases, there may be vehicle position deviations. lThere may be vehicle position deviations for some time until GPS signals are received after turning on the ignition. Map Matching This function compares your vehicle’s tracking data with the road data on the map disc, applies dead reckoning to determine the road you are driving on, and displays your vehicle on that road on the map. lIntelligent map matching addresses the following problems to achieve high accuracy in vehicle positioning. Position Correction for Elevated Roads Position accuracy is improved by detecting if the vehicle is running on or under an elevated road. Position Correction for Parking Garages Position accuracy is improved by detecting if the vehicle is driving in an elevated or underground parking garage. High-precision Gyrosensor A gyro detects turns with an accuracy of 0.05° per second. Combined with a speed sensor, it enables the system to display the current vehicle position even where GPS signals may be blocked. lUsing a spare tire in place of the regular one may cause vehicle position deviations. lAny difference between the direction which your vehicle actually travels and that shown on the map is automatically eliminated by azimuth correction. Precautions/System Performance Positioning Accuracy Before Use In the following situations, your vehicle position may not be displayed correctly on the map. But, as you keep driving, your vehicle position will be automatically corrected utilizing map matching and GPS data. Getting started Routing Running on an elevated road Making a turn after Running on a steep Running on a spiral Entering an intersection driving on a long mountain road road where a road branches straight road off at a small angle Address Book Voice Recognition CAR FERRY S T O P Running on gridiron Running on a layout of roads slippery road with tire chains Snaking on a wide road When your vehicle After getting off a ferryboat or vehicle is on a turntable with the ignition train turned off If necessary Route Guide Although you may encounter the following problems in route guide, there is nothing wrong with the system. In 300 m right turn Left turn ahead For certain intersection shapes, the upcoming turn or the name of the intersection may not be announced. For certain intersection shapes, you may be prompted to turn right or left When you should actually stay on the same road. Voice guidance for the planned route may continue even after you have deviated from that route such as having turned too early. 300 m In 300 m right turn 0m Some points where the road divides on highways or toll roads may not be displayed or announced. The Intersection Zoom Map may not always agree with the actual shape of the intersection. The announced distance to an upcoming turn may differ slightly from reality. 51 Warning Before Use Getting started The navigation system is just a support system for the driver. The driver should always pay attention to the traffic situation to safely make decisions. You may be unable to arrive at your destination due to out-of-date information on a map disc. You should be especially careful when selecting an urgent destination such as a hospital or a police station. Route Search Although you may encounter the following problems in a route search, there is nothing wrong with the system. The guide map may show roads that are not passable due to closure in winter or for other reasons. It may also show roads that are out of use due to the opening of a new road or for other reasons. 52 Routing Address Book Voice Recognition It may also show roads that only permit one-way traffic. ? which exit? Road out of use ? ? Destination ? Destination Depending upon the shape of roundabout (rotary), the guide map may show a wrong exit. If necessary · There may be cases where the route remains unchanged after another search. · A congested route may be shown. ? Destination It may show a common road under or over an elevated road. ? ? The route shown only reaches a point near your destination if your destination has no direct access road or the road is too narrow. It may show a route where you’ll have to make a U-turn. ? Destination Troubleshooting Note Symptom Verification First Before Use There may be some problems due to operational errors or mistakes. Please read this manual again and verify that there really is a problem before calling an Expert Dealer, we recommend an Authorized Mazda Dealer to ask for repair services. Getting started Check point Routing No picture lCheck if a fuse has blown. Consult an Expert Dealer, we recommend an Authorized Mazda Dealer. lCheck if the voltage level of the vehicle battery is low. Recharge the battery or change batteries. Address Book Display does not open or close Voice Recognition If necessary lCheck if the vehicle position changed when ACC was set to OFF. When, for example, The vehicle position is not correct · The vehicle was transported by a ferry boat. · The vehicle was rotated on a turn table in a parking lot. · The vehicle was transported by a tow track or other such vehicle. Drive the vehicle for a while where you are receiving GPS signals. 53 Before Use Symptom Getting started Check point No GPS symbols are displayed 54 Routing Address Book Voice Recognition lGPS signals may not be received because of obstructions. After moving the vehicle away from obstructions, the GPS signals can be received. The vehicle position is not displayed lCheck if the mode is set to the current position screen. Press POS If necessary No voice guidance lCheck if the volume control for the voice guidance has been turned off. lCheck if the vehicle is off the route. Repeat the route search while checking the route guide screen. lCheck if you are driving the vehicle in the wrong direction on the route. Repeat the route search checking the direction of the destination. Buttons on the remote control do not beep lCheck if [Beep] is set to [Off] ( page 42). Troubleshooting Error message Please insert a MAP DVD. Error Messages Solution Before Use lThe disc is not installed. Check if the disk is installed. If installed, check if the installed disk is correct. Getting started MAP DVD-Read Error The disc installed is not a MAP DVD. Routing lThe disc is wet, dirty, scratched, or upside down, or the disc cannot be played with this unit or the incorrect disk is installed. Eject the disc and check it. 55 Address Book Voice Recognition If necessary Maintenance Care of the Product Before Use Getting started n Cleaning n Cautions n Map this product for cleaning Use a dry, soft cloth to wipe it. Never use solvents such as benzene and thinners, they could mar the surface of the unit. disc If you require the latest map disc, consult an Expert Dealer, we recommend an Authorized Mazda Dealer. 56 Routing Address Book Voice Recognition Handling and Care of Map Discs n How lDo not touch the underside of the disc. lDo not scratch the disc. lDo not bend the disc. lWhen not in use, keep the disc in the case. lUse a dry, soft cloth to wipe from the center outward. to hold the disc Label side n Disc Cleaning n Do lDirect sunlight lNear car heaters lIn dirty, dusty and damp areas lOn seats and dashboards not leave discs in the following places: If necessary …
Wikipedia’s page for Mazda
Publisher: www.mazda.com


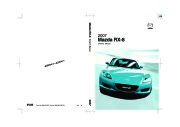 2007 Mazda RX 8 Owners Manual, 2007 - 1 of 443
 2007 Mazda RX 8 Owners Manual, 2007 - 2 of 443
 2007 Mazda RX 8 Owners Manual, 2007 - 3 of 443
 2007 Mazda RX 8 Owners Manual, 2007 - 4 of 443
 2007 Mazda RX 8 Owners Manual, 2007 - 5 of 443
 2007 Mazda RX 8 Owners Manual, 2007 - 6 of 443
 2007 Mazda RX 8 Owners Manual, 2007 - 7 of 443
 2007 Mazda RX 8 Owners Manual, 2007 - 8 of 443
 2007 Mazda RX 8 Owners Manual, 2007 - 9 of 443
 2007 Mazda RX 8 Owners Manual, 2007 - 10 of 443