From inside (document excerpt):
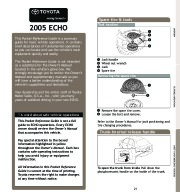
This Pocket Reference Guide is a summary guide for basic vehicle operations. It contains brief descriptions of fundamental operations so you can locate and use the vehicle’s main equipment quickly and easily. 2005 ECHO Tool location Spare tire & tools OVERVIEW The Pocket Reference Guide is not intended as a substitute for the Owner’s Manual located in the vehicle’s glove box. We strongly encourage you to review the Owner’s Manual and supplementary manuals so you will have a better understanding of the vehicle’s capabilities and limitations.
User and Operator’s Vehicle Manual Guide. Free Auto PDF Manual Download. Years covered by this manual: 2005.
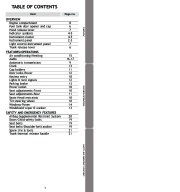
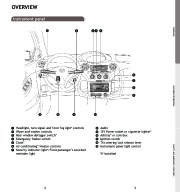
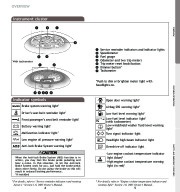
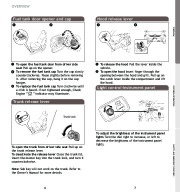
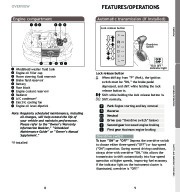
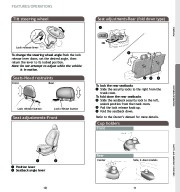
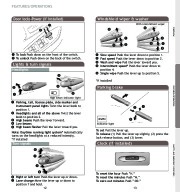
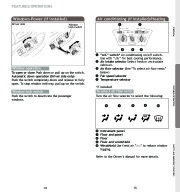
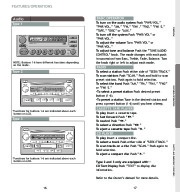
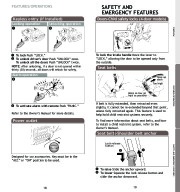
Your dealership and the entire staff of Toyota Motor Sales, U.S.A., Inc., wish you many years of satisfied driving in your new ECHO. Removing the spare tire FEATURES/OPERATIONS Jack handle Wheel nut wrench Jack Spare tire This Pocket Reference Guide is not a full guide to ECHO operations. Every ECHO owner should review the Owner’s Manual that accompanies this vehicle. ! A word about safe vehicle operations Refer to the Owner’s Manual for jack positioning and tire changing procedures. Remove the spare tire cover. Loosen the bolt and remove. Pay special attention to the boxed information highlighted in yellow throughout the Owner’s Manual. Each box contains safe operating instructions to help you avoid injury or equipment malfunction. Trunk-Internal release handle SAFETY AND EMERGENCY FEATURES All information in this Pocket Reference Guide is current at the time of printing. Toyota reserves the right to make changes at any time without notice. To open the trunk from inside Pull down the phosphorescent handle on the inside of the trunk. 21 TABLE OF CONTENTS OVERVIEW Engine compartment Fuel tank door opener and cap Hood release lever Indicator symbols Instrument cluster Instrument panel Light control-Instrument panel Trunk release lever FEATURES/OPERATIONS Air conditioning/Heating Audio Automatic transmission Clock Cup holders Door locks-Power Keyless entry Lights & turn signals Parking brake Power outlet Seat adjustments-Front Seat adjustments-Rear Seats-Head restraints Tilt steering wheel Windows-Power Windshield wiper & washer Item Page no. OVERVIEW FEATURES/OPERATIONS SAFETY AND EMERGENCY FEATURES Airbag-Supplemental Restraint System Doors-Child safety locks Seat belts Seat belts-Shoulder belt anchor Spare tire & tools Trunk-Internal release handle SAFETY AND EMERGENCY FEATURES 1 OVERVIEW Instrument panel OVERVIEW FEATURES/OPERATIONS Headlight, turn signal and front fog light* controls Wiper and washer controls Rear window defogger switch* Emergency flasher switch Clock* Air conditioning*/Heater controls Security indicator light*/Front passenger’s seat belt reminder light Audio 12V Power outlet or cigarette lighter* Ashtray* or coin box Ignition switch Tilt steering lock release lever Instrument panel light control *If installed SAFETY AND EMERGENCY FEATURES 2 3 OVERVIEW Instrument cluster OVERVIEW With tachometer Service reminder indicators and indicator lights Speedometer Fuel gauge Odometer and two trip meters Trip meter reset knob/button Dimmer button* Tachometer *Push to dim or brighten meter light with headlights on. FEATURES/OPERATIONS Indicator symbols Brake system warning light1 Open door warning light1 Driver’s seat belt reminder light1 Battery warning light1 Front passenger’s seat belt reminder light1 Malfunction indicator light1 Low fuel level warning light1 Airbag SRS warning light1 Low fuel level indicator light1 (with tachometer) Low windshield washer fluid level warning light1 Turn signal indicator light Headlight high beam indicator light Overdrive-off indicator light SAFETY AND EMERGENCY FEATURES Low engine oil pressure warning light1 Anti-lock Brake System warning light1 When the Anti-lock Brake System (ABS) function is in action, you may feel the brake pedal pulsating and hear a noise. In this situation, to let the Anti-lock Brake System work for you, just hold the brake pedal down more firmly. Do not pump the brake as this will result in reduced braking performance. *if installed 1 .Low engine coolant temperature indicator light (blue)2 .High engine coolant temperature warning light (in red)1 For details, refer to “Service reminder indicators and warning buzzers, ” Section 1-6, 2005 Owner’s Manual. 2 4 For details, refer to “Engine coolant temperature indicator and warning light ” Section 1-6, 2005 Owner’s Manual. 5 OVERVIEW Fuel tank door opener and cap Hood release lever OVERVIEW Trunk release lever To open the fuel tank door from driver side seat Pull up on the opener. To remove the fuel tank cap Turn the cap slowly counterclockwise. Pause slightly before removing it. After removing the cap, hang it on the cap hanger. To replace the fuel tank cap Turn clockwise until a click is heard. If not tightened enough, Check Engine ” ” indicator may illuminate. Light control-Instrument panel To release the hood Pull the lever inside the vehicle. To open the hood Insert finger through the opening between the hood and grill. Pull up on the catch lever inside the compartment and lift the hood.
Wikipedia’s page for Toyota
Publisher: www.toyota.com


 2005 Toyota Echo Reference Owners Guide, 2005 - Enlarge page 1 of 13
 2 of 13
 3 of 13
 4 of 13
 5 of 13
 6 of 13
 7 of 13
 8 of 13
 9 of 13
 10 of 13
 11 of 13
 12 of 13
 13 of 13