From inside (document excerpt):
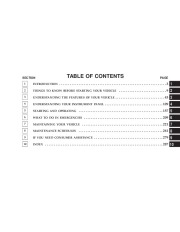
SECTION INTRODUCTION TABLE OF CONTENTS PAGE .3 1 .9 2 THINGS TO KNOW BEFORE STARTING YOUR VEHICLE UNDERSTANDING THE FEATURES OF YOUR VEHICLE UNDERSTANDING YOUR INSTRUMENT PANEL STARTING AND OPERATING 43 3 . 109 4 157 5 . 209 6 221 7 WHAT TO DO IN EMERGENCIES MAINTAINING YOUR VEHICLE MAINTENANCE SCHEDULES 261 8 . 279 9 IF YOU NEED CONSUMER ASSISTANCE INDEX . 287 10 INTRODUCTION CONTENTS Introduction . 4 Roll Over Warning . 4 How To Use This Manual . 6 Warnings And Cautions 7 Vehicle Identification Number 7 Vehicle Modifications / Alterations 8 1 4 INTRODUCTION INTRODUCTION Thank you for selecting a Jeep Wrangler and welcome to our worldwide family.
User and Operator’s Vehicle Manual Guide. Free Auto PDF Manual Download. Years covered by this manual: 2004.
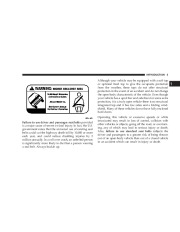
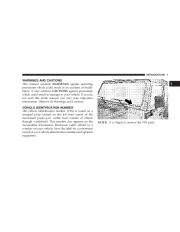
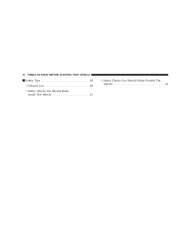
This is a specialized utility vehicle designed for both on-road and off-road use. It can go places and perform tasks for which conventional two-wheel drive enclosed vehicles were not intended. It handles and maneuvers differently from many passenger cars both on-road and off-road, so take time to become familiar with your vehicle. Before you start to drive this vehicle, read the Owner’s Manual. Be sure you are familiar with all vehicle controls, particularly those used for braking, steering, transmission, and transfer case shifting. Learn how your vehicle handles on different road surfaces. Your driving skills will improve with experience. When driving off-road or working the vehicle, don’t overload it or expect it to overcome the laws of nature. Always observe federal, state, provincial and local laws wherever you drive. As with other vehicles of this type, failure to operate this vehicle correctly may result in loss of control or an accident. Be sure to read “On-Road/Off-Road Driving Tips ” in this manual. Roll Over Warning Utility vehicles have a significantly higher roll over rate than other types of vehicles. This vehicle has a higher ground clearance, higher center of gravity, and narrower track than many passenger cars. It is capable of performing better in a wide variety of off-road applications. Driven in an unsafe manner, all vehicles can be caused to go out of control. Because of the higher center of gravity and the narrower track, if this vehicle is out of control it may roll over when some other vehicles may not. Do not attempt sharp turns or abrupt maneuvers or other unsafe driving actions that can cause loss of vehicle control. Failure to operate this vehicle safely may result in an accident, roll over of the vehicle and serious injury or death. Because of its open-body construction, your vehicle offers less protection than closed vehicles in the event of an accident. INTRODUCTION 5 Although your vehicle may be equipped with a soft top or optional hard top to give the occupants protection from the weather, these tops do not offer structural protection in the event of an accident and do not change the open-body characteristic of the vehicle. Even though your vehicle has a sport bar and side bars for some extra protection, it is a truly open vehicle-there is no structural integrated top and it has low sides and a folding windshield. Many of these vehicles do not have fully enclosed hard doors. Failure to use driver and passenger seat belts provided is a major cause of severe or fatal injury. In fact, the U.S. government notes that the universal use of existing seat belts could cut the highway death toll by 10,000 or more each year, and could reduce disabling injuries by 2 million annually. In a roll over crash, an unbelted person is significantly more likely to die than a person wearing a seal belt. Always buckle up. Operating this vehicle at excessive speeds or while intoxicated may result in loss of control, collision with other vehicles or objects, going off the road, or overturning, any of which may lead to serious injury or death. Also, failure to use standard seat belts subjects the driver and passengers to a greater risk of being thrown out of an open-body vehicle than out of a closed vehicle in an accident which can result in injury or death. 1 6 INTRODUCTION This manual has been prepared with the assistance of service and engineering specialists to acquaint you with the operation and maintenance of your new vehicle. It is supplemented by a Warranty Information Booklet and various customer oriented documents. You are urged to read these publications carefully. Following the instructions and recommendations in this manual will help assure safe and enjoyable operation of your vehicle. NOTE: After you read the manual, it should be stored in the vehicle for convenient reference and remain with the vehicle when sold so that the new owner will be aware of all safety warnings. When it comes to service, remember that your authorized dealer knows your vehicle best, has the factory-trained technicians and genuine Mopar parts, and is interested in your satisfaction. WARNING! Engine exhaust, some of its constituents, and certain vehicle components contain or emit chemicals known to the State of California to cause cancer and birth defects or other reproductive harm. In addition, certain fluids contained in vehicles and certain products of component wear contain or emit chemicals known to the State of California to cause cancer and birth defects or other reproductive harm. HOW TO USE THIS MANUAL Consult the table of contents to determine which section contains the information you desire. The detailed index, at the rear of the manual, contains a complete listing of all subjects. INTRODUCTION 7 WARNINGS AND CAUTIONS This manual contains WARNINGS against operating procedures which could result in an accident or bodily injury. It also contains CAUTIONS against procedures which could result in damage to your vehicle. If you do not read this entire manual you may miss important information. Observe all Warnings and Cautions. VEHICLE IDENTIFICATION NUMBER The vehicle identification number (VIN) is found on a stamped plate located on the left front corner of the instrument panel pad, visible from outside of vehicle through windshield. This number also appears on the Automobile Information Disclosure Label affixed to a window on your vehicle. Save this label for a convenient record of your vehicle identification number and optional equipment. 1 NOTE: It is illegal to remove the VIN plate. 8 INTRODUCTION VEHICLE MODIFICATIONS / ALTERATIONS WARNING! Any modifications or alterations to this vehicle could seriously affect its roadworthiness and safety and may lead to an accident resulting in serious injury or death. THINGS TO KNOW BEFORE STARTING YOUR VEHICLE CONTENTS A Word About Your Keys .11 Ignition Key . .11 Key-In-Ignition Reminder . .12 Sentry Key Immobilizer System — If Equipped .12 Important Note About Service .13 Replacement Keys . .13 Customer Key Programming . .13 General Information . .14 Steering Wheel Lock — If Equipped .14 To Manually Lock The Steering Wheel .14 To Release The Steering Wheel Lock .14 Illuminated Entry — If Equipped .15 Doors And Locks .15 Door Locks .15 Occupant Restraints .16 Lap/Shoulder Belts .17 Adjustable Upper Shoulder Belt Anchorage. .21 Seat Belts And Pregnant Women . .21 Seat Belt Extender . .21 Driver And Front Passenger Supplemental Restraint Systems (SRS) — Airbags . .22 Child Restraint . .29 Engine Break-In Recommendations . .39 2 10 THINGS TO KNOW BEFORE STARTING YOUR VEHICLE Safety Tips . .40 Exhaust Gas . .40 Safety Checks You Should Make Inside The Vehicle . .41 Safety Checks You Should Make Outside The Vehicle . .41 THINGS TO KNOW BEFORE STARTING YOUR VEHICLE 11 A WORD ABOUT YOUR KEYS The keys for your new vehicle are enclosed in a plastic bag with the key code number on it. If you received your keys without the bag, ask your dealer to give you the number. The key code can also be obtained by the dealer from your vehicle invoice. Ignition Key Insert the key fully, then turn the switch to one of the four illustrated positions. The key can be inserted or withdrawn only in the LOCK position. To remove the ignition key on models with an automatic transmission, place the gearshift lever in P (Park), turn the ignition key to LOCK, and remove the key. 2 To remove the ignition key on models with a manual transmission, depress and hold the key release button, turn the ignition key to LOCK, and remove the key. 12 THINGS TO KNOW BEFORE STARTING YOUR VEHICLE Key-In-Ignition Reminder Opening the driver’s door when the key is in the ignition, sounds a signal to remind you to remove the key. CAUTION! Always remove the key from the ignition, and lock all doors when leaving the vehicle unattended. SENTRY KEY IMMOBILIZER SYSTEM — IF EQUIPPED The Sentry Key Immobilizer System (SKIS) prevents unauthorized operation of the vehicle by disabling the engine. The system will shut the engine down after 2 seconds of running if an invalid key is used to start the vehicle. This system utilizes ignition keys which have an electronic chip (transponder) embedded into them. Only keys that have been programmed to the vehicle can be used to start and operate the vehicle for longer than the 2 second validation time period. The Sentry Key Immobilizer System does not need to be armed or activated. Operation of the system is automatic regardless of whether or not the vehicle is locked or unlocked. During normal operation, the SKIS indicator light will come on for 3 seconds immediately after the ignition switch is turned on for a bulb check. Afterwards, if the bulb remains on, this indicates a malfunction in the electronics. If the bulb begins to flash immediately after the ignition switch is turned on, this indicates that an invalid key is being used to start the vehicle. Both of these conditions will result in the engine being shut down after 2 seconds of running. Keep in mind that a key which has not been programmed is also considered an invalid key even if it is cut to fit the ignition for that vehicle. If the SKIS indicator light comes on during normal vehicle operation (it has been running for longer than 10 seconds) a fault has been detected in the electronics and the vehicle should be serviced as soon as possible. NOTE: · The Sentry Key Immobilizer System is not compatible with remote starting systems. Use of these systems may result in vehicle starting problems and loss of security protection. THINGS TO KNOW BEFORE STARTING YOUR VEHICLE 13 · Mobil SpeedpassTM, additional Sentry Keys, or any other transponder equipped components on the same keychain will not cause a key-related (Transponder) fault unless the additional part is physically held against the ignition key being used when starting the vehicle. Also, cell phones, pagers, or other RF electronics will not cause interference with this system. All of the keys provided with your new vehicle have been programmed to the vehicle electronics. Important Note About Service A four digit PIN number is needed to service the Sentry Key Immobilizer System. This number can be obtained from your authorized dealer. However, this number can also be found on your customer invoice that you were given upon receipt of your vehicle. Replacement Keys NOTE: Only keys that have been programmed to the vehicle electronics can be used to start the vehicle. Once a Sentry Key has been programmed to a vehicle, it cannot be programmed to any other vehicle. At the time of purchase, the original owner is provided with a four digit PIN number. This number is required for dealer replacement of keys. Duplication of keys may be performed at an authorized dealer or by using the Customer Key Programming procedure. This procedure consists of programming a blank key to the vehicle electronics. A blank key is one which has never been programmed. NOTE: When having the Sentry Key System serviced, bring all vehicle keys to the dealer. Customer Key Programming You can program new keys to the system if you have two valid keys by doing the following: 1. Cut the additional Sentry Key Transponder blank(s) to match the ignition switch lock cylinder key code. 2. Insert the first valid key into the ignition switch and turn the ignition switch ON for at least 3 seconds but no longer than 15 seconds. Turn the ignition switch OFF and remove the first key. 2 14 THINGS TO KNOW BEFORE STARTING YOUR VEHICLE 3. Insert the second valid key and turn the ignition switch ON within 15 seconds. After ten seconds, a chime will sound and the SKIS indicator light will begin to flash. Turn the ignition switch OFF and remove the second key. 4. Insert a blank Sentry Key into the ignition switch and turn the ignition switch ON within 60 seconds. After 10 seconds, a single chime will sound. The SKIS indicator light will stop flashing, turn on for 3 seconds; then turn off. The new Sentry Key has been programmed. Repeat this process to program up to a total of 8 keys. General Information The Sentry Key Immobilizer System complies with FCC rules part 15 and with RSS-210 of Industry Canada. Operation is subject to the following two conditions: 1. This device may not cause harmful interference. 2. This device must accept any interference that may be received, including interference that may cause undesired operation. STEERING WHEEL LOCK — IF EQUIPPED Your vehicle may be equipped with a passive steering wheel lock (manual transmission only). This lock prevents steering the vehicle without the ignition key. If the steering wheel is moved a half turn in either direction and the key is not in the ignition, the steering wheel will lock. To Manually Lock the Steering Wheel With the engine running, rotate the steering wheel 1/2 revolution from straight ahead position, turn off the engine and remove the key. Rotate the steering wheel slightly in both directions until the lock engages. To Release the Steering Wheel Lock Insert the key in the ignition and turn the wheel slightly to the right or left to disengage the lock. NOTE: If you turned the wheel to the right to engage the lock, you must turn the wheel slightly to the right to disengage it. If you turned the wheel to the left to engage the lock, turn the wheel slightly to the left to disengage it. THINGS TO KNOW BEFORE STARTING YOUR VEHICLE 15 ILLUMINATED ENTRY — IF EQUIPPED The interior lights will come on when you open any door. The lights will remain on after all of the doors are closed, and then fade to off or they will immediately fade to off once the ignition switch is turned on. DOORS AND LOCKS NOTE: The ignition key that is used to start the vehicle is used to lock or unlock the doors, tailgate, console storage, and glove box. To unlock doors and tailgate insert the key and turn. Once unlocked, the tailgate can be opened or closed without using the key. To open the tailgate, lift the latch release and swing open the tailgate. Door Locks Doors on both hard-top and soft-top models are equipped with a rocker-type interior door lock. To lock a door when leaving your vehicle, press to the “Lock ” position and close the door. 2 16 THINGS TO KNOW BEFORE STARTING YOUR VEHICLE WARNING! · For personal security reasons and safety in an accident, lock the vehicle doors when you drive as well as when you park and leave the vehicle. · When leaving the vehicle always remove the key from the ignition lock, and lock your vehicle. Do not leave children unattended in the vehicle, or with access to an unlocked vehicle. Unsupervised use of vehicle equipment may cause severe personal injuries and death. OCCUPANT RESTRAINTS Some of the most important safety features in your vehicle are the restraint systems. These include the front and rear seat belts for the driver and all passengers, and front airbags for both the driver and front passenger. If you will be carrying children too small for adult-size belts, your seat belts can also be used to hold infant and child restraint systems. Please pay close attention to the information in this section. It tells you how to use your restraint system properly to keep you and your passengers as safe as possible. WARNING! In a collision, you and your passengers can suffer injuries, including fatalities, if you are not properly buckled up. You can strike the interior of your vehicle or other passengers, or you can be thrown out of the vehicle. Always be sure you and others in your vehicle are buckled up properly. THINGS TO KNOW BEFORE STARTING YOUR VEHICLE 17 Buckle up even though you are an excellent driver, even on short trips. Someone on the road may be a poor driver and cause a collision that includes you. This can happen far away from home or on your own street. Research has shown that seat belts save lives, and that they can reduce the seriousness of injuries in a collision. Some of the worst injuries happen when people are thrown from the vehicle. Seat belts reduce the possibility of ejection and the risk of injury caused by striking the inside of the vehicle. Everyone in a motor vehicle should be belted at all times to reduce or prevent injuries. Lap/Shoulder Belts The outboard front and rear seats of your vehicle are equipped with lap/shoulder belts. The belt webbing retractor is designed to lock during very sudden stops or collisions. This feature allows the shoulder part of the belt to move freely with you under normal conditions. But in a collision, the belt will lock and reduce the risk of your striking the inside of the vehicle or being thrown out. WARNING! · It is extremely dangerous to ride in a cargo area, inside or outside of a vehicle. In a collision, people riding in these areas are more likely to be seriously injured or killed. · Do not allow people to ride in any area of your vehicle that is not equipped with seats and seat belts. · Be sure everyone in your vehicle is in a seat using a seat belt properly. 2 18 THINGS TO KNOW BEFORE STARTING YOUR VEHICLE WARNING! · Wearing a seat belt incorrectly is dangerous. Seat belts are designed to go around the large bones of your body. These are the strongest parts of your body and take the forces of a collision the best. Wearing your belt in the wrong place could make your injuries in a collision much worse. You might suffer internal injuries, or you could even slide out of part of the belt. Follow these instructions to wear your seat belt safely and to keep your passengers safe, too. · Two people should never be belted into a single seat belt. People belted together can crash into one another in an accident, hurting one another badly. Never use a lap/shoulder belt or a lap belt for more than one person, no matter what their size. Lap/Shoulder Belt Operating Instructions 1. Enter the vehicle and close the door. Sit back and adjust the seat. 2. The seat belt latch plate is above the back of the front seat, next to your arm in the rear seat. Grasp the latch plate and pull out the belt. Slide the latch plate up the webbing as far as necessary to allow the belt to go around your lap. 3. When the belt is long enough to fit, insert the latch plate into the buckle until you hear a “click. ” THINGS TO KNOW BEFORE STARTING YOUR VEHICLE 19 WARNING! · A belt that is buckled into the wrong buckle will not protect you properly. The lap portion could ride too high on your body, possibly causing internal injuries. Always buckle your belt into the buckle nearest you. 4. Position the lap belt across your thighs, below your abdomen. To remove slack in the lap belt portion, pull up on the shoulder belt. To loosen the lap belt if it is too tight, tilt the latch plate and pull on the lap belt. A snug belt r …..
documents. We appreciate that you have made a major investment when you purchased your new vehicle. Your dealer has also made a major investment in facilities, tools, and training to assure that you are absolutely delighted with your ownership experience. You’ll be pleased with their sincere efforts to resolve any warranty issues or related concerns. IF YOU NEED CONSUMER ASSISTANCE 283 WARRANTY INFORMATION See your manufacturer’s Warranty Information Booklet for information on warranty coverage and transfer of warranty. 9 284 IF YOU NEED CONSUMER ASSISTANCE MOPAR PARTS Mopar fluids, lubricants, parts, and accessories are available from your dealer. They will help you keep your vehicle operating at its best. REPORTING SAFETY DEFECTS In the 50 United States and Washington D.C.: If you believe that your vehicle has a defect which could cause a crash or cause injury or death, you should immediately inform the National Highway Traffic Safety Administration (NHTSA) in addition to notifying the manufacturer. If NHTSA receives similar complaints, it may open an investigation, and if it finds that a safety defect exists in a group of vehicles, it may order a recall and remedy campaign. However, NHTSA cannot become involved in individual problems between you, your dealer, and the manufacturer. To contact NHTSA, you may either call the Auto Safety Hotline toll free at 1-800-424-9393 (or 366-0123 in Washington DC area) or write to: NHTSA, U.S. Dept. of Transportation, Washington DC 20590. You can also obtain other information about motor vehicle safety from the Hotline. In Canada: If you believe that your vehicle has a safety defect, you should contact the Customer Service Department immediately. Canadian customers who wish to report a safety defect to the Canadian government should write to Transport Canada, Motor Vehicle Defect Investigations and Recalls, 2780 Sheffield Road, Ottawa, Ontario K1B 3V9. IF YOU NEED CONSUMER ASSISTANCE 285 PUBLICATION ORDER FORMS To order the following manuals, you may use either the website or the phone numbers listed below. Visa, Mastercard, American Express, and Discover orders are accepted. If you prefer mailing your payment, please call for an order form. NOTE: A street address is required when ordering manuals. (No P.O. Boxes). · Service Manuals. These comprehensive service manuals provide the information that students and professional technicians need in diagnosing/troubleshooting, problem solving, maintaining, servicing and repairing DaimlerChrysler Corporation vehicles. A complete working knowledge of the vehicle, system and/or components is written in straightforward language with illustrations, diagrams and charts. · Diagnostic Procedure Manuals. Filled with diagrams, charts and detailed illustrations, these practical manuals make it easy for students and technicians to find and fix problems on computercontrolled vehicle systems and features. They show exactly how to find and correct problems the first time, using step-by-step troubleshooting and driveability procedures, proven diagnostic tests and a complete list of all tools and equipment. · Owner’s Manuals. These manuals have been prepared with the assistance of service and engineering specialists to acquaint you with specific Chrysler group vehicles. Included are starting, operating, emergency and maintenance procedures as well as specifications, capabilities and safety tips. Call Toll Free at 18008904038 (U.S.) or 18003871143 (Canada) Or Visit us on the World Wide Web at: www.techauthority.daimlerchrysler.com www.daimlerchrysler.ca/manuals or 9 INDEX 10 288 INDEX About Your Brakes 177 Add-A-Trunk . 65 Adding Washer Fluid 155 Air Cleaner, Engine . 234 Air Conditioner Maintenance 235 Air Conditioning . 151 Air Conditioning Controls 152 Air Conditioning, Operating Tips . 154 Air Conditioning Refrigerant 236 Air Filter . 234 Air Pressure, Tires 192 Airbag 22 Airbag Deployment 27 Airbag Light 29,118 Airbag Maintenance 29 Airbag On/Off Switch 26 Alignment and Balance 195 Alterations/Modifications, Vehicle 8 Antenna, Satellite Radio 147 Antifreeze (Engine Coolant) . 258 Anti-Lock Brake System 179 Anti-Lock Warning Light . 119 Appearance Care . 248 Ashtray . 62 Ashtrays and Lighter . 62 Automatic Dimming Mirror 46 Automatic Transmission . 165,245 Adding Fluid 246 Fluid and Filter Changes 245 Fluid Level Check . 245 Fluid Type 245 Gear Ranges . 166 Shifting 165 Special Additives . 246 Torque Converter . 170 Auxiliary Electrical Outlet . 63 Auxiliary Power Outlet . 63 Battery . 234 Emergency Starting 216 Voltmeter . 116 Belts, Drive . 231 Belts, Seat . 17 Body Mechanism Lubrication 237 Brake System 243 Anti-Lock . 179 INDEX 289 Hoses 243 Master Cylinder 244 Parking 175 Warning Light . 119 Brakes . 177 Brake/Transmission Interlock 166 Break-In Recommendations, New Vehicle 39 Bulb Replacement 257 Calibration, Compass . 47 Capacities, Fluid . 258 Caps, Filler Fuel . 200 Power Steering . 236 Car Washes . 249 Carpeting . 252 Cassette Tape and Player Maintenance . 148 Cassette Tape Player . 126,130,132,140,142 Catalytic Converter . 232 Caution, Exhaust Gas . 40 CD Changer 133,138 CD Player 128,135,137 CD Player Maintenance 149 Cellular Phone . 149 Chains, Tire . 196 Changing A Flat Tire 213 Chart, Tire Sizing . 185 Check Engine Light . 118 Child Restraint . 29,33,36 Child Restraint Tether Anchors . 33 Cigar Lighter . 62 Climate Control 149 Clock 120 Clutch Interlocking Ignition System 160,165 Compact Disc Maintenance . 149 Compact Disc Player 140 Compass 46 Compass Calibration . 47 Compass Variance . 48 Console . 65 Console, Floor 65 Contract, Service . 282 Converter, Catalytic . 232 Cooling System 239 Adding Coolant (Antifreeze) . 241 Coolant Capacity . 258 10 290 INDEX Coolant Level 241 Disposal of Used Coolant . 240 Drain, Flush, and Refill . 239 Inspection . 239 Points to Remember . 242 Pressure Cap 241 Selection of Coolant 240,258 Temperature Gauge 118 Corrosion Protection 248 Crankcase Emission Control System . 234 Cruise Control 60 Cruise Light . 116 Cup Holder 64 Customer Assistance 280 Daytime Running Lights 58 Dealer Service . 227 Defroster, Rear Window 154 Defroster, Windshield . 151,153 Delay Wipers . 58 Deploying, Airbag . 27 Diagnostic System, Onboard . 225 Dimmer Switch, Headlight . 57 Dipsticks Oil (Engine) . 228 Disabled Vehicle Towing . 219 Disposal Engine Oil 231 Used Coolant 240 Door Locks 15 Doors 15 Drive Belts 231 Driving 181 Off-Pavement 181 Off-Road . 181 On Hills 182 On Slippery Surfaces 181 When to Use Low Range . 181 Dual Top 66 Electrical Outlet, Auxiliary . 63 Electrical Power Outlets . 63 Electronic Speed Control 60 Emergency Brake . 175 Emergency, In Case of Brake Warning Light . 119 INDEX 291 Coolant Temperature Gauge . 118 Engine Oil Pressure Gauge 117 Jacking . 211 Jump Starting 216 Emission Control System Maintenance 226,262 Engine Air Cleaner 234 Block Heater . 162 Break-In Recommendations . 39 Compartment 224 Exhaust Gas Caution . 40 Fails to Start . 161 Flooded, Starting . 161 Fuel Requirements . 197,258 Jump Starting 216 Oil . 228,258 Oil Disposal . 231 Oil Filter 231 Oil Pressure Gauge 117 Oil Selection . 258 Overheating . 210 Starting 160 Temperature Gauge 118 Engine Oil Viscosity Chart 230 Entry System, Illuminated . 15 Exhaust Gas Caution . 40 Exhaust System 238 Extender, Seat Belt . 21 Exterior Finish Care . 249 Fabric Care 250,252 Fabric Top 250 Filters Air Cleaner 234 Engine Fuel . 234 Engine Oil 231 Finish Care . 249 Flashers Hazard Warning 210 Turn Signal 116 Flooded Engine Starting 161 Fluid Capacities 258 Fluid Level Checks 248 Automatic Transmission 245 Engine Oil 228 Manual Transmission 247 10 292 INDEX Power Steering . 236 Fog Lights . 58 Folding Rear Seat . 52 Folding Windshield . 102 Four Wheel Drive 170 Shifting 171 Four Wheel Drive Operation 170 Front Axle 248 Fuel . 197 Filler Cap . 200 Filter 234 Gasoline 197 Gauge . 120 Materials Added 199 Octane Rating 197 Requirements 258 Tank Capacity 258 Fuel System Caution 200 Fuses 254 Gas Cap 200 Gasoline . 197 Gasoline, Reformulated 198 Gasoline/Oxygenate Blends . 198 Gauges Coolant Temperature . 118 Fuel . 120 Odometer . 119 Oil Pressure . 117 Speedometer . 117 Tachometer 116 Voltmeter . 116 Gear Ranges 164,166 Glass Cleaning . 252 Glove Compartment . 65 Hard Top 78 Hard Top Removal 79 Hazard Warning Flasher 210 Headlights Dimmer Switch . 57 Switch 57 Heater . 150 Heater, Engine Block 162 High Beam Indicator 117 Holder, Cup . 64 INDEX 293 Hood Release 55 Hoses 242,243 Hydraulic Clutch Fluid 246 Ignition Key 11 Illuminated Entry . 15 Infant Restraint . 29,30 Inflation Pressure Tires . 192 Inside Rearview Mirror . 46 Instrument Cluster 115 Instrument Panel and Controls . 114 Interior Appearance Care . 252 Interior Fuses 254 Interior Lights 56 Intermittent Wipers 58 Introduction 4 Jack Location Jack Operation . Jacking Instructions . Jump Starting . 211 214 214 216 Key, Programming . Key Release Button Key, Replacement . Key, Sentry Key-In Reminder Keys . 13 11 13 12 12 11 Lane Change and Turn Signals . 116 Lap Belts 17 Lap/Shoulder Belts 17 LATCH (Lower Anchors and Tether for CHildren) . 33 Lead Free Gasoline 197 Lighter, Cigar 62 Lights 56 Airbag . 29,118 Anti-Lock . 119 Anti-Lock Warning 119 Brake Warning . 119 Check Engine 118 Check Gauges 118 Cruise 116 10 294 INDEX Daytime Running 58 Dimmer Switch, Headlight . 57 Fog 58 Headlight Switch 57 High Beam 117 High Beam Indicator . 117 Instrument Cluster . 57 Interior 56 Lights On Reminder 57 Low Fuel . 120 Passing . 57 Seat Belt Reminder 117 Sentry Key 116 Turn Signal 58,116 Upshift Indicator 117 Warning (Instrument Cluster Description). 116 Loading Vehicle Tires . 188 Locks 15 Door . 15 Steering Wheel 14 Lower Anchors and Tether for CHildren (LATCH) 33 Lubrication, Body . 237 Lug Nuts . 215 Maintenance, Airbag . 29 Maintenance Free Battery . 234 Maintenance Procedures 228 Maintenance Schedule . 262 Schedule A . 274 Schedule B . 265 Maintenance Schedules 262 Malfunction Indicator Light 118,226 Manual, Service 285 Manual Transmission . 163,246 Fluid Level Check . 247 Lubricant Selection 246 Shift Speeds . 164 Master Cylinder 244 Mirrors . 46 Automatic Dimming 46 Compass/Temperature 46 Outside . 49 Rearview 46 Modifications/Alterations, Vehicle 8 INDEX 295 Mopar Parts 227,284 Multi-Function Control Lever . 56 New Vehicle Break-In Period . 39 Occupant Restraints 16 Octane Rating, Gasoline 197 Odometer . 119 Trip . 119 Off-Pavement Driving . 181 Off-Road Driving . 181 Oil, Engine . 228 Capacity 258 Dipstick 228 Filter 231 Identification Logo 230 Materials Added to 231 Recommendation 230,258 Viscosity 258 Onboard Diagnostic System 225,226 Outside Rearview Mirrors . 49 Overheating, Engine . 210 Owner’s Manual . 285 Paint Care 248 Paint Damage . 248 Parking Brake . 175 Passenger Airbag On/Off Switch 26 Passing Light . 57 PCV Valve 234 Pets 39 Pets, Transporting . 39 Placard, Tire and Loading Information . 188 Polishing and Waxing . 249 Power Distribution Center 256 Steering 236 Pregnant Women and Seat Belts . 21 Preparation for Jacking . 213 Pressure Gauge, Oil . 117 Radial Ply Tires 193 Radio . 122,130,135,140 Radio Broadcast Signals 121 Radio Operation 130,135,149 Radio, Satellite . 145 Rear Axle . 248 10 296 INDEX Rear Window Defroster 154 Rear Window Features . 154 Rear Wiper/Washer . 155 Rearview Mirrors 46 Reclining Front Seats . 50 Recommended Fluids, Lubricants and Genuine Parts . 259 Recreational Towing . 205 Shifting into Transfer Case Neutral (N) . 205 Shifting out of Transfer Case Neutral (N). 206 Reformulated Gasoline . 198 Refrigerant 236 Release, Hood 55 Reminder, Lights On . 57 Replacement Bulbs 257 Replacement Keys . 13 Replacement Parts 227 Replacement Tires 194 Reporting Safety Defects . 284 Restraints, Child 29 Restraints, Occupant . 16 Rotation, Tires . 196 Safety Checks Inside Vehicle . 41 Safety Checks Outside Vehicle 41 Safety Defects, Reporting . 284 Safety Information, Tire 184 Safety Tips . 40 Satellite Radio . 145 Satellite Radio Antenna 147 Schedule, Maintenance . 262 Seat Belts 17 Adjustable Upper Shoulder Anchorage 21 And Pregnant Women 21 Child Restraint 29,36 Extender 21 Front Seat 17 Reminder . 117 Seats . 50 Adjustment 50 Rear Folding . 52 Rear Seat Cushion Removal 53 Reclining 50 Tilting 51 Selection of Oil 230 INDEX 297 Sentry Key 12 Sentry Key Programming 13 Sentry Key Replacement 13 Service Assistance 280 Service Contract 282 Service Manuals 285 Setting the Clock . 120 Shift Indicator Light . 117 Shift Speeds, Manual Transmission 164 Shifting 163 Automatic Transmission 165 Manual Transmission 163 Shoulder Belt Upper Anchorage . 21 Shoulder Belts 17 Signals, Turn 58,116 Snow Chains 196 Snow Plow . 205 Soft Top . 82 Spare Tire 213 Spark Plugs . 232 Specifications Fuel . 197 Oil 230 Speed Control 60 Speedometer 117 Starting 160 Automatic Transmission 160 Emergency (Jump Starting) 216 Engine Block Heater . 162 Engine Fails to Start . 161 Manual Transmission 160 Starting Procedures . 160 Steering Power . 236 Tilt Column 60 Wheel Lock 14 Wheel, Tilt . 60 Storage 65,256 Storage, Vehicle 256 Storing Your Vehicle . 256 Supplemental Restraint System – Airbag . 22 Tachometer . 116 Temperature Gauge, Engine Coolant . 118 Tether Anchor, Child Restraint 33 Tilt Steering Column . 60 10 298 INDEX Tire and Loading Information Placard . 188 Tire Identification Number (TIN) . 187 Tire Markings . 184 Tire Safety Information . 184 Tires 191 Air Pressure . 192 Alignment 195 Alignment and Balance . 195 Balancing . 195 Chains . 196 Changing 211,213 General Information . 191 High Speed . 193 Inflation Pressures 192 Jacking . 214 Load Capacity . 188 Pressure Label . 192 Radial . 193 Replacement . 194 Rotation 196 Sizes . 185 Spare Tire . 213 Spinning 193 Tread Wear Indicators 194 Wheel Nut Torque 215 To Open Hood 55 Torque Converter Clutch . 170 Towing . 202,219 Disabled Vehicle 219 Recreational . 205 Trailering . 202 Trac-Lok Rear Axle 173 Trailer Towing . 202 Hitches . 197 Transfer Case 247 Four-Wheel-Drive Operation . 170 Maintenance . 247 Transmission Automatic 165 Maintenance 245,246 Manual . 163 Shifting 163 Transporting Pets 39 Tread Wear Indicators . 194 Trip Odometer . 119 Trip Odometer Reset Button . 119 INDEX 299 Turn Signals . 58,116 Underhood Fuses . 256 Upholstery Care 252 Vacuum/Vapor Harnesses 242 Variance, Compass . 48 Vehicle Identification Number . 7 Vehicle Modifications/Alterations 8 Vehicle Storage . 256 Vinyl Trim 252 Voltmeter . 116 Warning Lights (Instrument Cluster Description) . 116 Warnings and Cautions 7 Warranty Information 283 Washer, Adding Fluid . 155 Washers, Windshield 238 Waxing and Polishing . 249 Wheel Alignment and Balance . 195 Wheel Changing . 211 Wheel Mounting . 215 Wheel Nut Torque 215 Windshield Defroster . 151,153 Windshield, Folding . 102 Windshield Washer Aiming . 238 Windshield Washers . 58,238 Fluid 238 Windshield Wiper Blades . 237 Windshield Wipers 58 Wiper, Rear . 155 10 …
Wikipedia’s page for Jeep
Publisher: www.jeep.com


 2004 Jeep Wrangler Owners Manual, 2004 - 1 of 299
 2004 Jeep Wrangler Owners Manual, 2004 - 2 of 299
 2004 Jeep Wrangler Owners Manual, 2004 - 3 of 299
 2004 Jeep Wrangler Owners Manual, 2004 - 4 of 299
 2004 Jeep Wrangler Owners Manual, 2004 - 5 of 299
 2004 Jeep Wrangler Owners Manual, 2004 - 6 of 299
 2004 Jeep Wrangler Owners Manual, 2004 - 7 of 299
 2004 Jeep Wrangler Owners Manual, 2004 - 8 of 299
 2004 Jeep Wrangler Owners Manual, 2004 - 9 of 299
 2004 Jeep Wrangler Owners Manual, 2004 - 10 of 299